

What Luma Image to Image is good at
- Prompt-driven image editing: Modifies existing images based on text prompts while preserving certain features and structures from the original
- Changing objects and shapes: The node works well for changing objects and shapes, though it may not be ideal for color changes
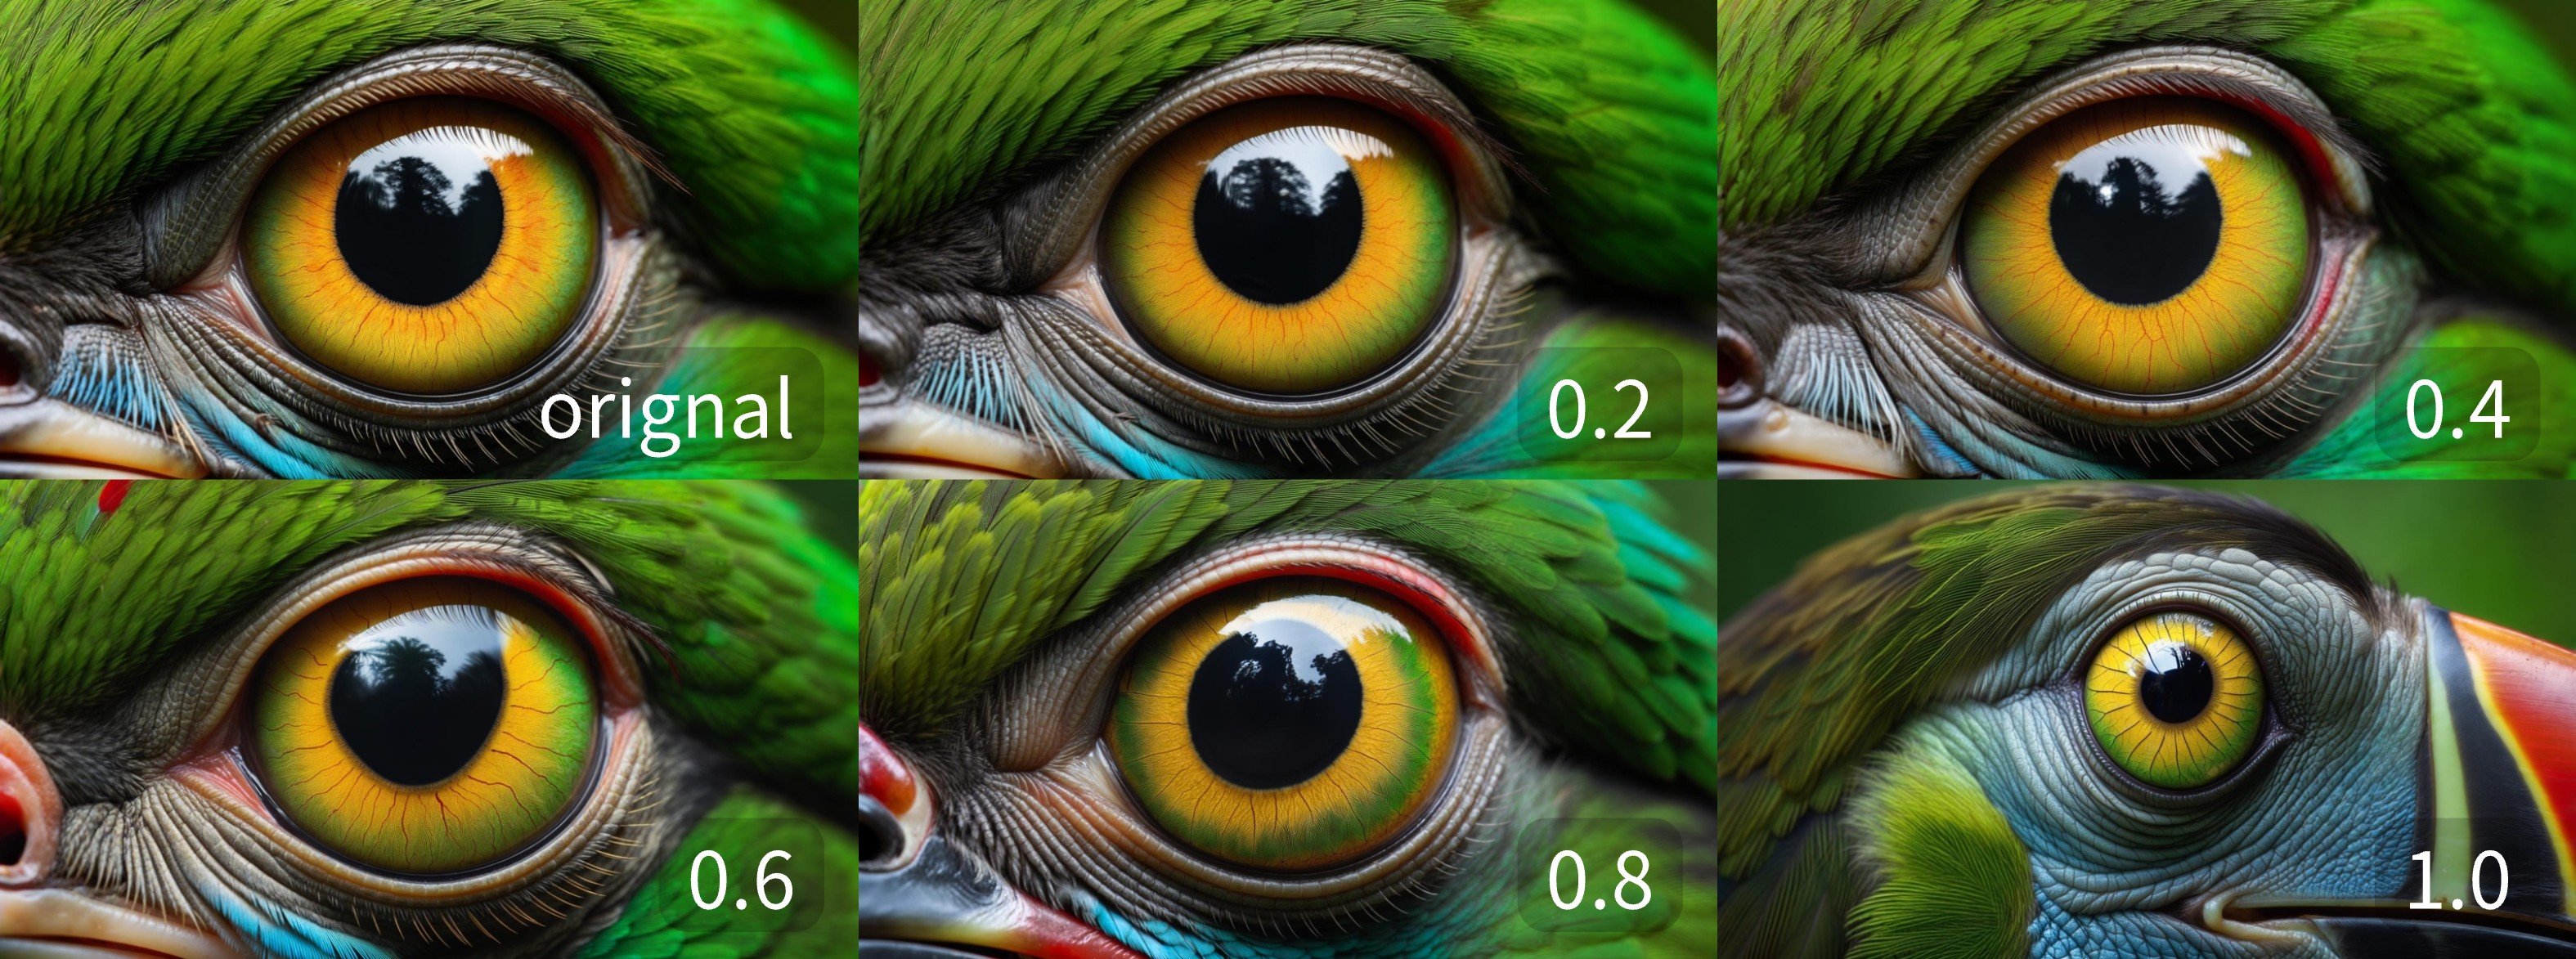
- Adjustable input influence: The
image_weightparameter controls how strongly the input image shapes the result, with lower values staying closer to the original
Example outputs
Results at differentimage_weight values, showing how strongly the input image influences the generated output:
Luma Image to Image Partner Nodes Workflow
1. Download Workflow File
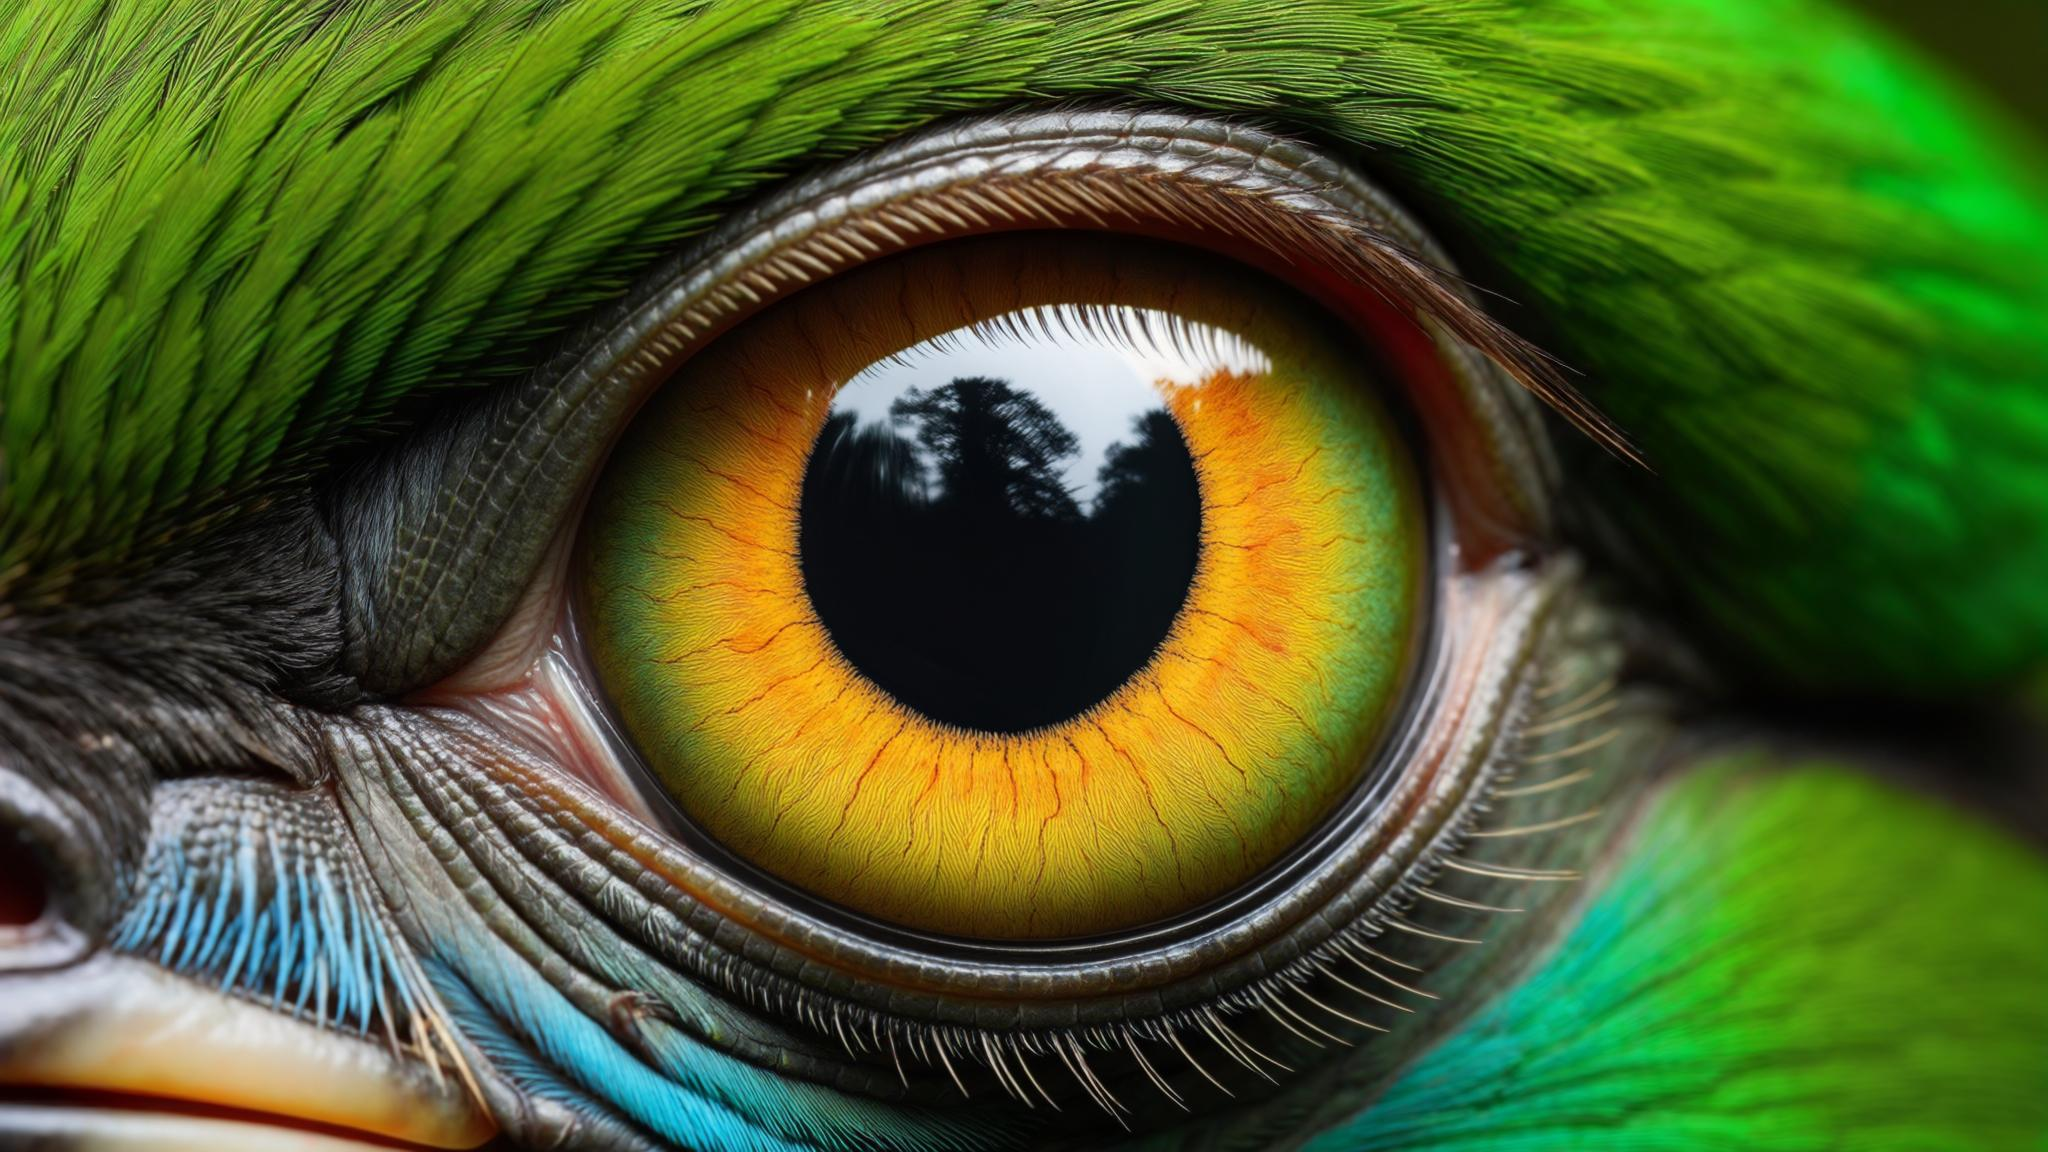
Download and drag the following image into ComfyUI to load the workflow (workflow information is included in the image metadata): Download this image to use as input:
2. Complete the Workflow Steps
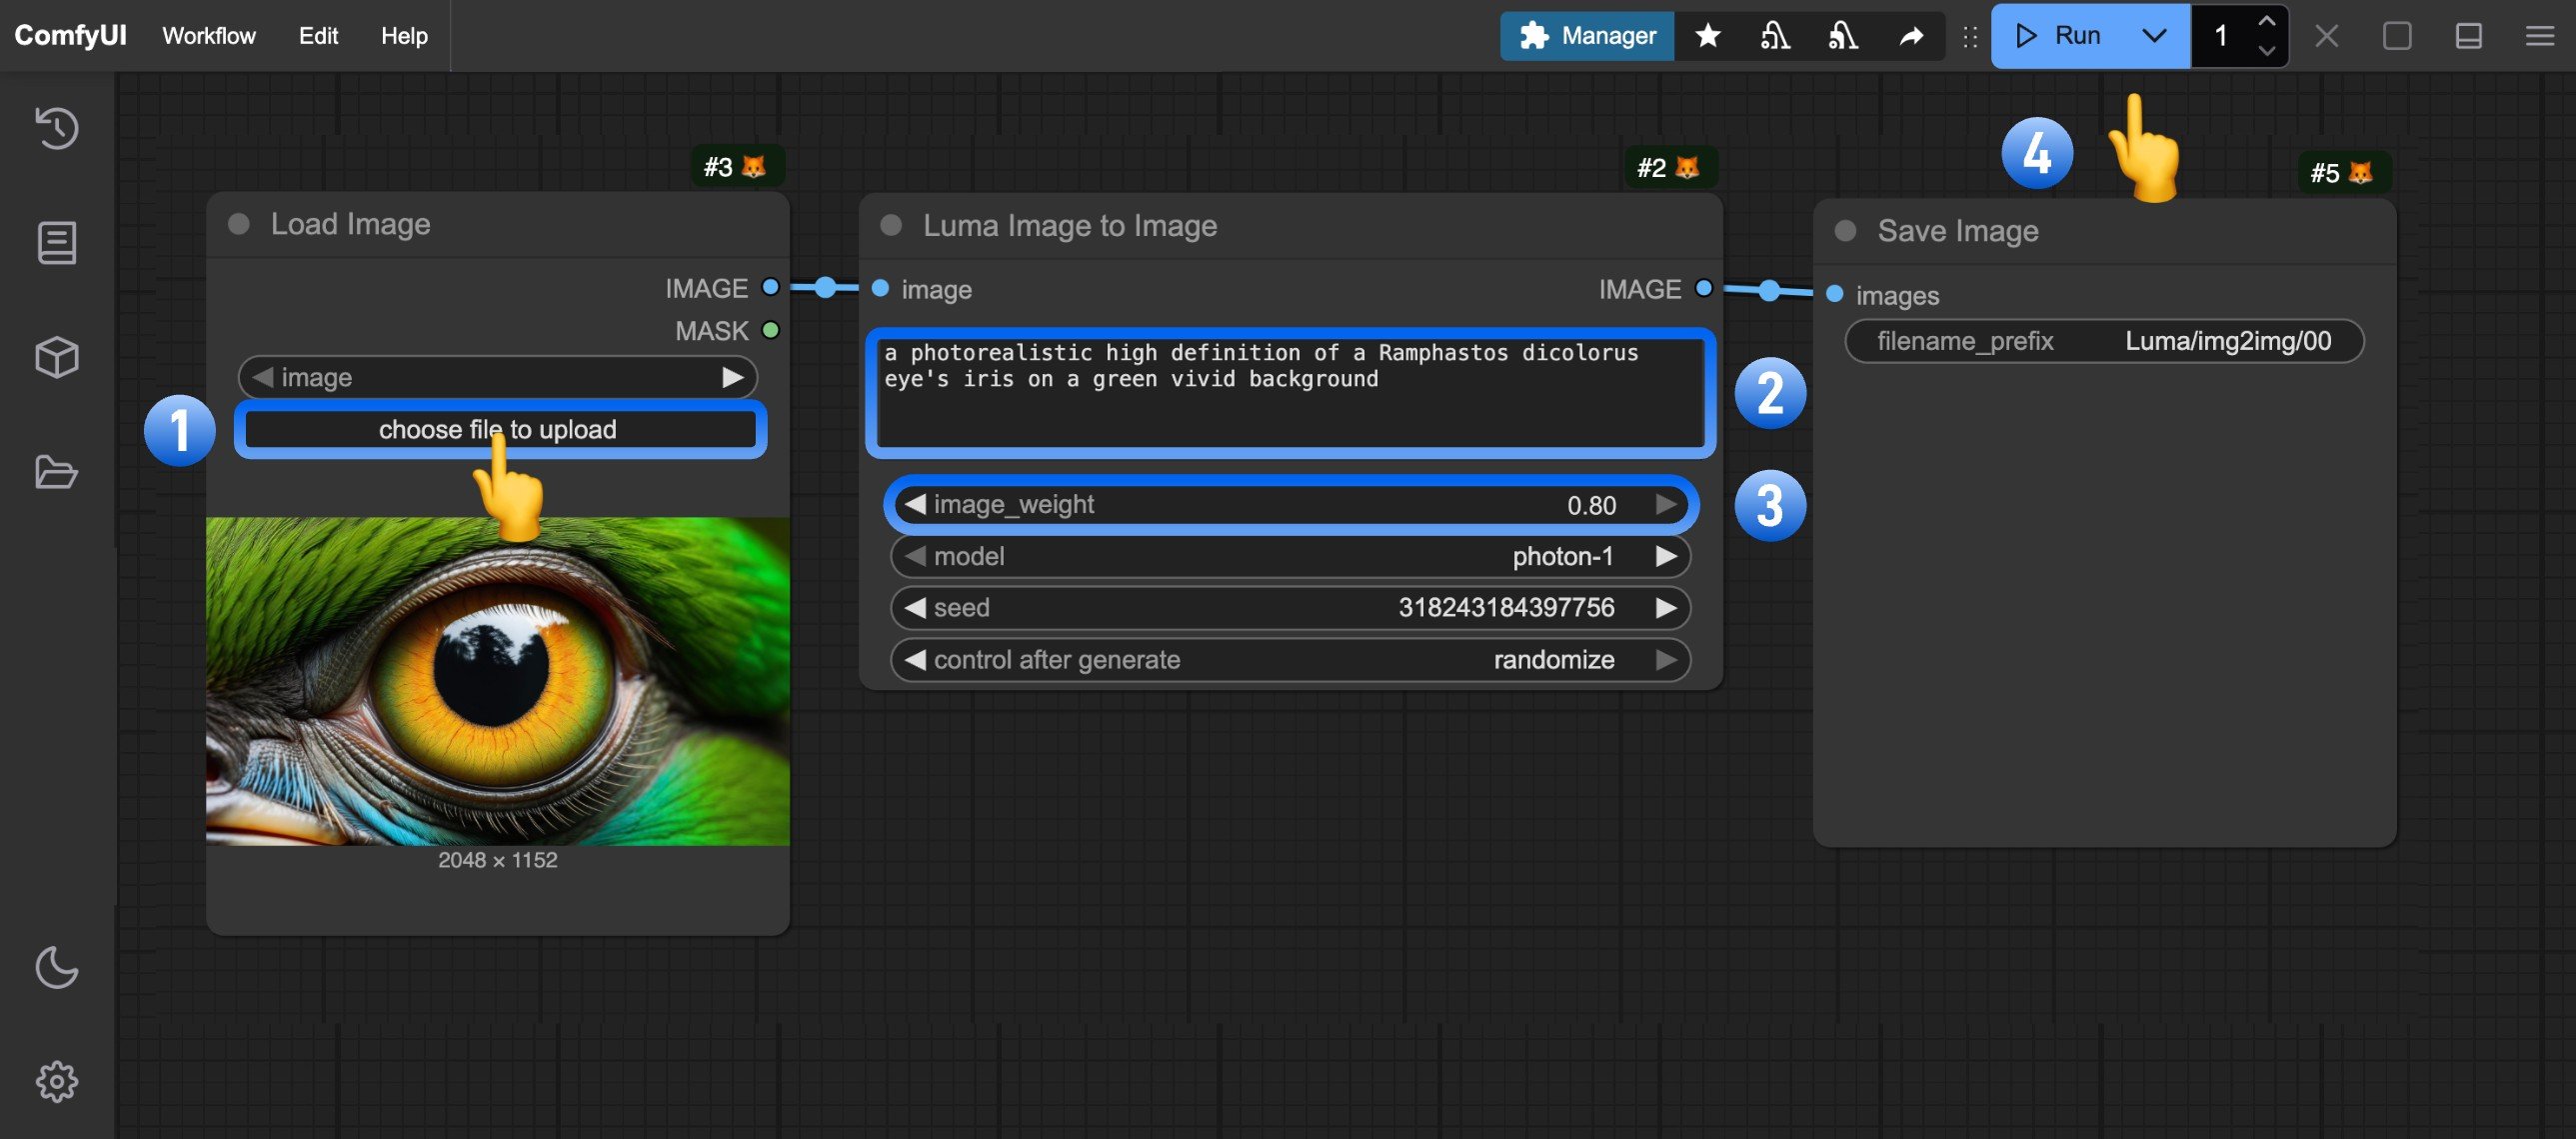
- Click Upload on the
Load Imagenode to upload your input image - (Optional) Modify the workflow prompts
- (Optional) Adjust
image_weightto change input image influence (lower values stay closer to original) - Click
Runor use shortcutCtrl(cmd) + Enterto generate the image - After API returns results, view the generated image in the
Save Imagenode. Images are saved to theComfyUI/output/directory
3. Results with Different image_weight Values